

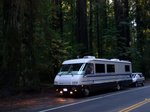
When we got back home from our Winter Trip to Florida, we had had a pretty good list of major repairs that needed to be done!! I blamed the failures either on Patsy driving a part of the way, or us traveling with the “unlucky” Woods family!!! Here’s proof that Patsy drove…………

I don’t have proof about the Woods, but I have it on the top of the list!!!
The failures that we had were:
1. Loss of a leveling jack that had to be removed for us to move
2. Failure of the inverter that left us with no “house battery charging”, and 1/2 input voltage on the PS of the Bus
3. The propane refrigerator did not cool well, and we decided to get a new ‘Residential Refrigerator” installed.
4. The front TV failed (9 years old)
We have made an appointment with Brannon Hutcheson of Custom RV Inc. in Red Bay to do the first three items. Since the TV replacement would have to be done by a second shop in Red Bay, and given our time constraints in Red Bay, I decided to tackle that job myself!
The original TV was a Panasonic 32”, and I replaced it with a 40” Samsung with a 2160p, SMART TV from Best Buy. To finish out the trim work, I purchased a Samsung sound bar and woofer. The issue was that the new TV was that it was wider but shorter than the original TV. That meant that I would have to fill in some space either below or above the new Samsung! I chose to put the sound bar on top, to keep the sound bar which stood 3” away from the wall, from becoming a ‘head knocker’ since it was in the entry into the Bus.
Here’s the final look of the TV install…….

The sound bar is near the ceiling, and the woofer is installed under the DS couch. Here’s a closer look……….

I was able to get a pretty good match on the wood above the TV.
Here are some detail pictures of the install. It is easy to see the two horizontal 2x4’s that I installed with the two vertical 2x2.5’s (actually a ripped in half 2x4) that I used to support the assembly……..


The metal TV mount that I used was a MORryde TV1-006H. It has a spring-loaded pin that holds the mount & TV in place until the pin is pulled. The chain and steel cable shown below is for pulling the pin. These ‘pull’ loops (the chain came with the mount, and I made the steel cable as a back-up, in case the pull chain broke!) were routed through the air vents located between the back of the TV enclosure and the windshield.

I was pleased with the final install, but the hardest part of the project was locating the exact mounting spot inside the old cabinet to center the TV across the old enclosure!!
The next post will begin the accounts or our current trip!
1 comment:
Smart move, installing the residential reefer. Absolutely the best thing we ever did.
Post a Comment