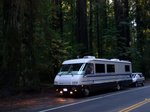
Since we aren’t traveling for a while, and the weather is nice, We have been doing some repairs and upgrades.
While at the Red Bay Campground, we found wood grate covers for the Bus to replace the old metal ones that were originally installed. When we bought them, the finish did not match our cherry wood very well, and the finish was not clear! When we got home, I sanded them to the wood, stained and finished them. Here are pictures of the installed grates:
While at Red Bay, we got a ceiling fan installed in the bedroom by Brannon at Custom RV, Inc., and when I got home, I installed the remote (with holder) under the cabinets above the bed to act as a convenient switch:
The fan……
The cabinets above the bed….
The switch/controller…..
We also worked on the bedroom closet. The Bus came with only one light in the closet on the left side. I bought a similar fixture while in Red Bay, and installed it when we got home. Much better lighting, and Patsy is happy because her side was the one without the light!!
We also wanted to improve the closet storage. The first picture shows the bottom of the closet as built. We added the wire “pantry shelf” from Lowe’s. We will be using plastic baskets similar to other bedroom storage containers. Here are the pictures:
With shelf installed………..


We also installed some brackets to hang the stools that the grandkids use……….
Another upgrade was the installation of a remote light switch controller for inside lights. As discussed on the TRVN, I purchased a 12v controller over the internet for about $25 including shipping, and installed it on the light switch for the center row of lights in the living area of the Bus. The controller came with two remotes, so I used velcro to attach one at the entry door, and will put the other in our towed car. Here are some pictures (note: I forgot to take a picture of the controller wired to the switch before I re-installed the switch):
Switch wiring for installation of controller….
The controller package with remotes…..
Wall switches after re-installation…….

Ceiling lights that are remotely controlled from entry door, or from a remote in the car when we return from a trip. Note: They can still be turned on/off by the original wall switch…….
In doing some periodic maintenance, I discovered some acid build-up in the battery compartment. I took the metal battery holder off, grinded off the corrosion and loose paint, primed and painted it with epoxy paint.. The reinstall looks like new:
We have also been “spring cleaning”. We have had the Bus since Dec 2008, so we cleaned the inside from back to front. We even cleaned every screen and window. It is now ready for a road trip……. Soon, I hope!!


1 comment:
Thanks for sharing your mods.
Abase
Post a Comment